This is an old revision of the document!
Table of Contents
Kodak Portrait
Despite the name, it's 3d. Despite the vendor/label, it's surprisingly mod-friendly
General notes/instructions
- the stock print surface is a mirror. don't print PET-G (and possibly ABS?) directly on it. they have a tendency to bond with glass too strongly.
- the stock nozzles aren't hardened. don't print filament with additives using them.
- the printer uses 12V PSU, so heating the print surface takes a while
- the printer uses the hotend on the right as a Z probe; don't be surprised to see the printer using it for probing the bed before print
- the printer has been klipperified (WIP)! stock slicer won't work anymore!
profile(s) for slicer(s) (WIP)
For now: define your own: 170×210, 235mm high, g-code dialect: I use smoothie (based on the fact that it is running smoothieware); 2 extruders with 0.4mm nozzles; prints using extruder 1 (all-metal) by-default, which may be suboptimal for PLA, but appears to print fine
Hardware documentation
- standard raspberry pi 3b
- standard smoothieware v1
- LED driver board connected to the rpi (needs investigating a bit)
- removed most of hotglue as it did not hold the connectors anymore anyway
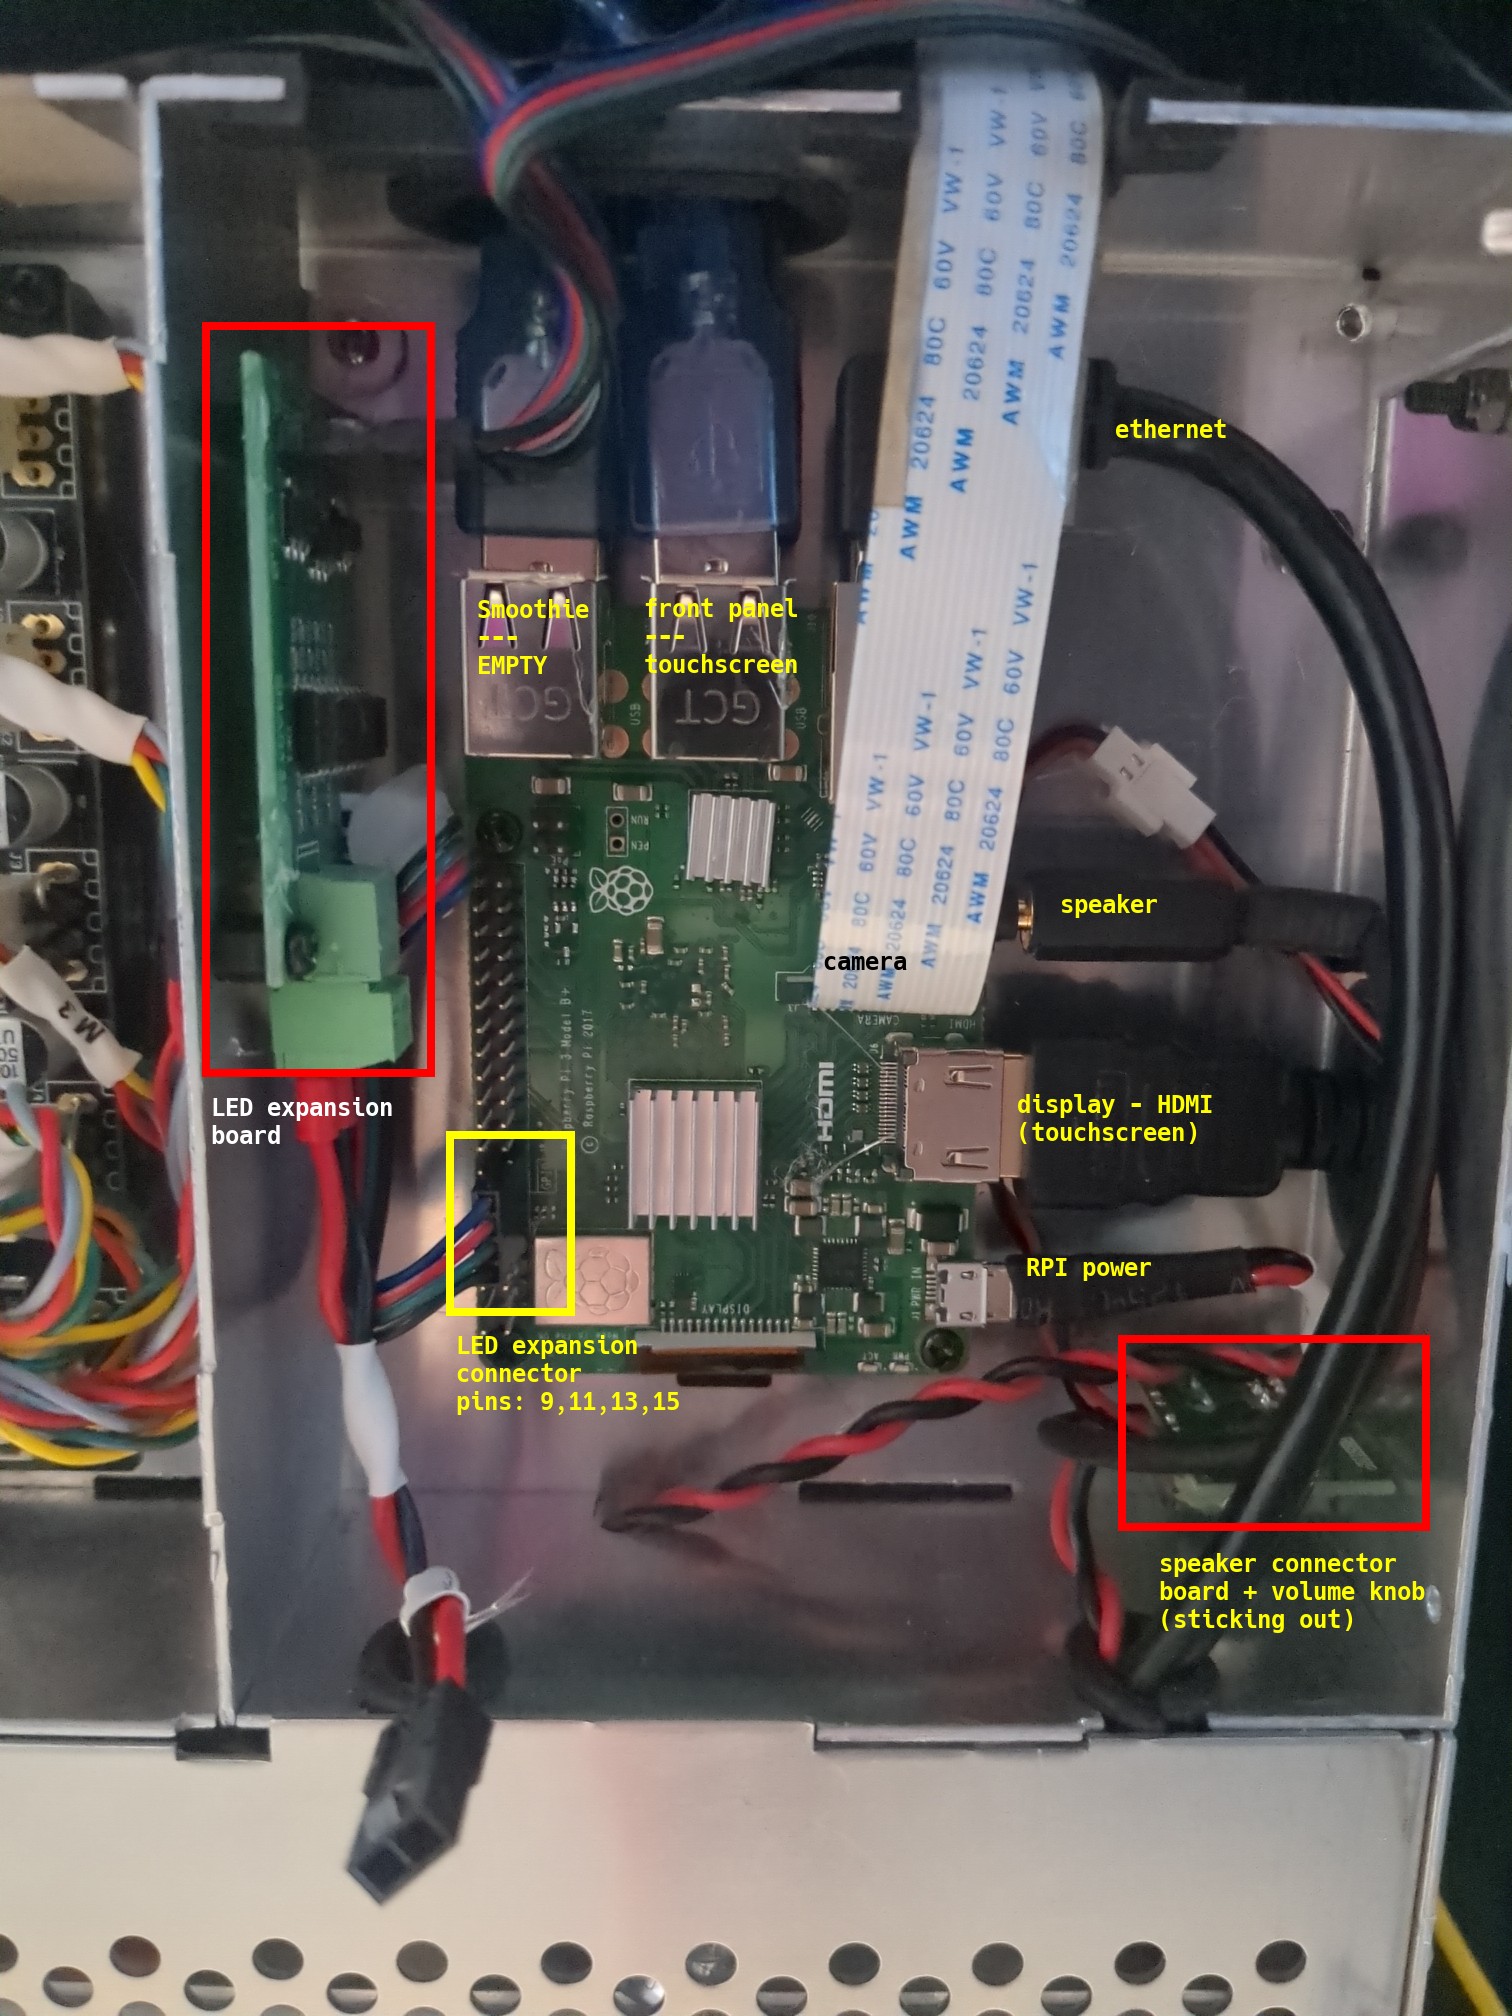
Raspberry PI
Nothing really surprising here
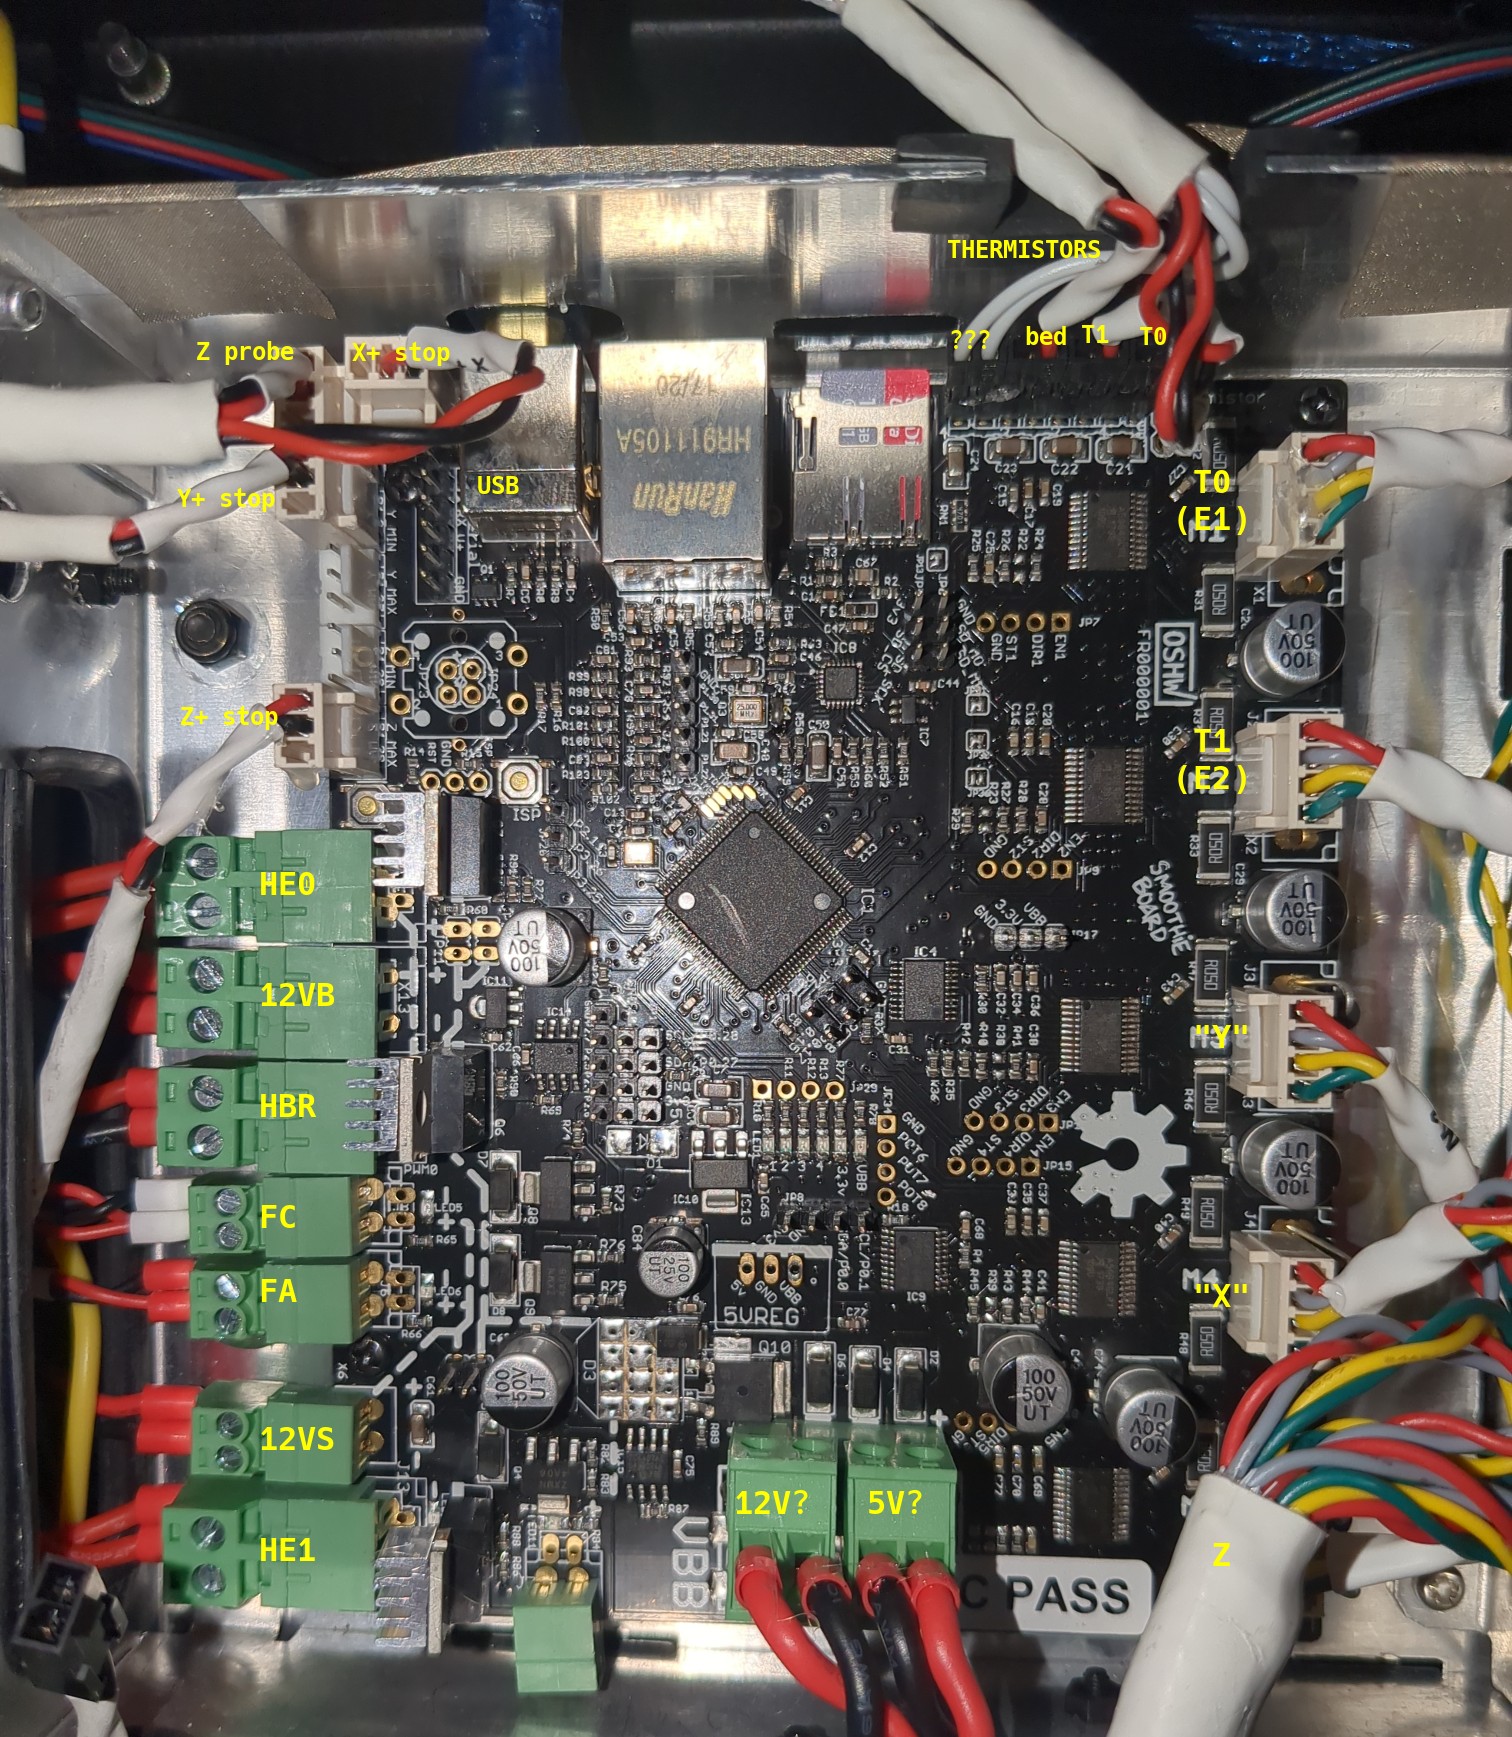
Smoothieboard
Almost all connected cables are labeled; motor connector labels are taken mostly from configuration file, as they were only labeled M{1..5}
Stock smoothieware config: https://code.hackerspace.pl/ar/kodak-portrait/src/branch/main/smoothie-stock/config
See also http://smoothieware.org/pinout
legend:
- HE0: heater for extruder 1
- HE1: heater for extruder 2
- HBR: heatbed heater
- FC: M106/M107 Fan; extruder fan(s?)
- FA: M42/M43 Fan; “ambient fan”? possibly the exhaust/filter fan
Config also references the two free endsop inputs as filament runout sensors, but neither sensors nor cables are present.
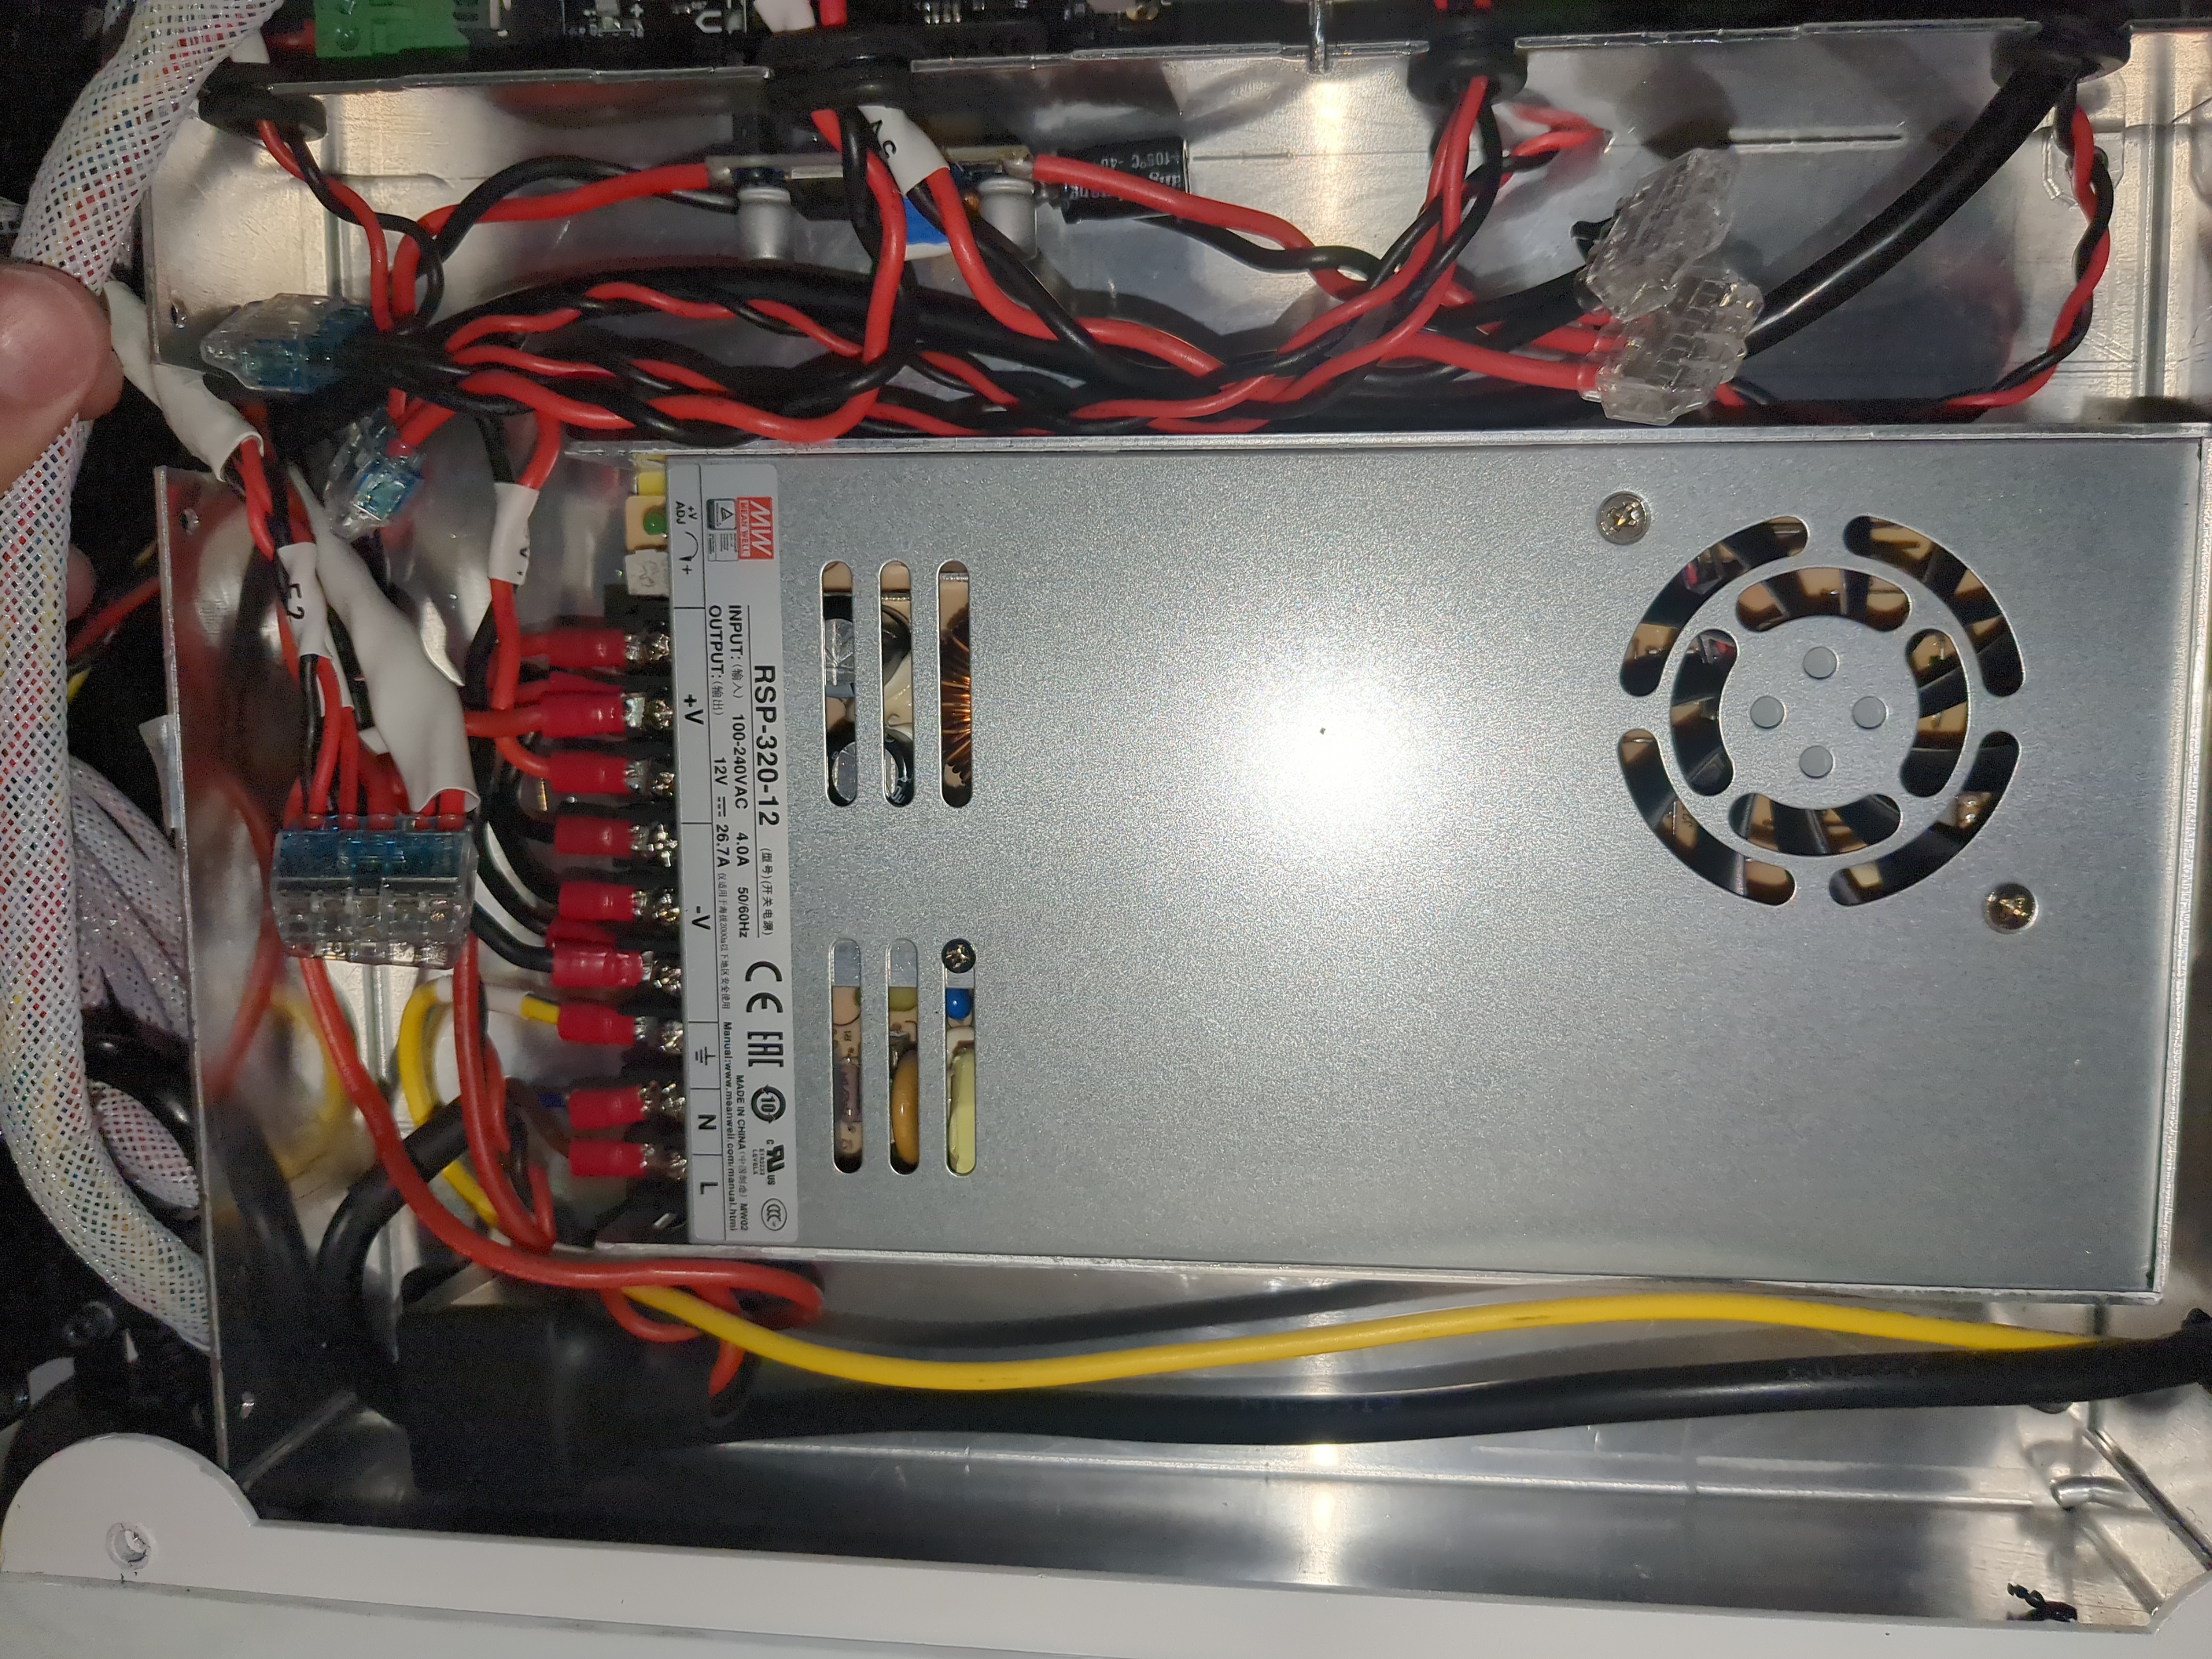
Power supply
Again, nothing really surprising here. Just a “Mean Well RSP-320-12” and a stepdown board providing 5V to rpi and smoothie

TODO
- solve filament/power switch access
- profile(s) for slicer(s)
- obtain second print surface
- calibration, again, this time with klipper.
- fix camera/audio under nixos
- possibly maybe fix touchscreen rotation properly, right now it's a hack: https://code.hackerspace.pl/ar/nibylandia/src/commit/6741165a4fb6c1c6d97be5bb38ffbaf90ce29fbb/nixos/akamanto/default.nix#L12 https://code.hackerspace.pl/ar/nibylandia/src/commit/6741165a4fb6c1c6d97be5bb38ffbaf90ce29fbb/nixos/akamanto/default.nix#L151-L156
WIP
This section needs expansion. You can help by prodding my (ar) ADHD brain to do something with it, or pick an item from TODO list yourself.
- general usage instructions
- klipper config: mcu config generated using
klipper-genconf, actual printer config will follow later; - nixos (with impermanence! don't want to replace sd cards in this thing too often; inserting them is a major PITA) for rpi3 + klipper + moonraker + klipperscreen + fluidd/mainsail; reduce scope/replace with rpi4 or something else if this proves to be too much for the 1G rpi3 that's in there
DONE
This section needs expansion. You can help by prodding my (ar) ADHD brain to do something with it, or pick an item from TODO list yourself.
- hardware documentation (what's connected where and how)
- calibration, at least to the extent reasonable before we have proper slicer profiles
Preliminary findings
- controlled with a normal rpi3 with raspbian + smoothieboard combo
- screen is connected over hdmi (+ usb for touch?), 800×480 res
- camera uses the camera interface
- one usb port is used for connecting to smoothieboard, one is routed to the outside, and one is free
- there's a speaker!
- doesn't appear to do anything fancy to lock-out mods
- didn't complain about creating
/root/.ssh/authorized_keys - on running system, root filesystem is by-default mounted readonly, which is a Good Choice™ on an rpi with sd card;
mount -o remount,rw /and latermount -o remount,ro /work as expected. password for* the printer runs its control panel using chromium pointed at a webserver running locally. that's listening on all interfaces. try http://printers-ip-address:8888/home (check setup → connectivity → network)piuser is, for now, identical to hswaw wifi password, passwordless sudo is enabled.- „Myślę, że w tym przypadku masz do czynienia nie tylko z powierzchnią ataku, ale również z objętością” ~ drozdziak1
- disassembly, at least for getting to the electronics compartment is trivial:
- unscrew two screws on left and right (4 total) that hold the bottom panel (regular hex bit)
- unscrew the feet (next size larger hex bit)
- unscrew 4 screws on the *sides* of the metal box holding the electronics (the ones that you see in front of you hold the fans)
- remember to detach the fans when opening the box
Resources
“stock” slicer (really just an old cura, reskinned), stock firmware images: https://cloud.is-a.cat/s/NsaCHnyDMn8cFWE
Many resources about the printer from, apparently, its actual vendor: https://exolicious.com
Plans
Klipper! Given the above, it shouldn't be difficult.
Would prefer to keep hardware mostly unmodified, except for following
- replace the e3d v6 with e3d revo (and obxidian nozzles) which is almost a drop-in replacement
- replace the 12V PSU with 24V
- add filament runout sensors