This is an old revision of the document!
Table of Contents
Kodak Portrait
Despite the name, it's 3d. Despite the vendor/label, it's surprisingly mod-friendly
Current status
- configuration still in flux, but should be editable from the web ui
- screen sometimes doesn't show anything, and constantly blinks instead. looks like a hardware issue as it throws a bunch of errors about hdmi timeouting in dmesg; if the lights inside are on (magenta/pink by default), web ui should be accessible
General notes/instructions
- the stock print surface is a mirror. don't print PET-G (and possibly ABS?) directly on it. they have a tendency to bond with glass too strongly.
- the stock nozzles aren't hardened. don't print filament with additives using them.
- the printer uses 12V PSU, so heating the print surface takes a while
- the printer uses the hotend on the right as a Z probe
- the printer has been klipperified (WIP)! stock slicer won't work anymore!
- password for root user is, for now, identical to hswaw wifi password
- host
+ printerconfig is at: https://code.hackerspace.pl/ar/nibylandia/src/branch/main/nixos/akamanto/default.nix - klipper printer config is here temporarily: printer.cfg.zip
- don't do Nix things when a print is in progress; overloads the RPI and makes klipper unhappy
- takes a while to boot; when it's done you should see KlipperScreen interface
profile(s) for slicer(s) (WIP)
PrusaSlicer
Very rudimentary config. Works, including hotend swaps, but is a bit slow kodak-config-bundle.ini
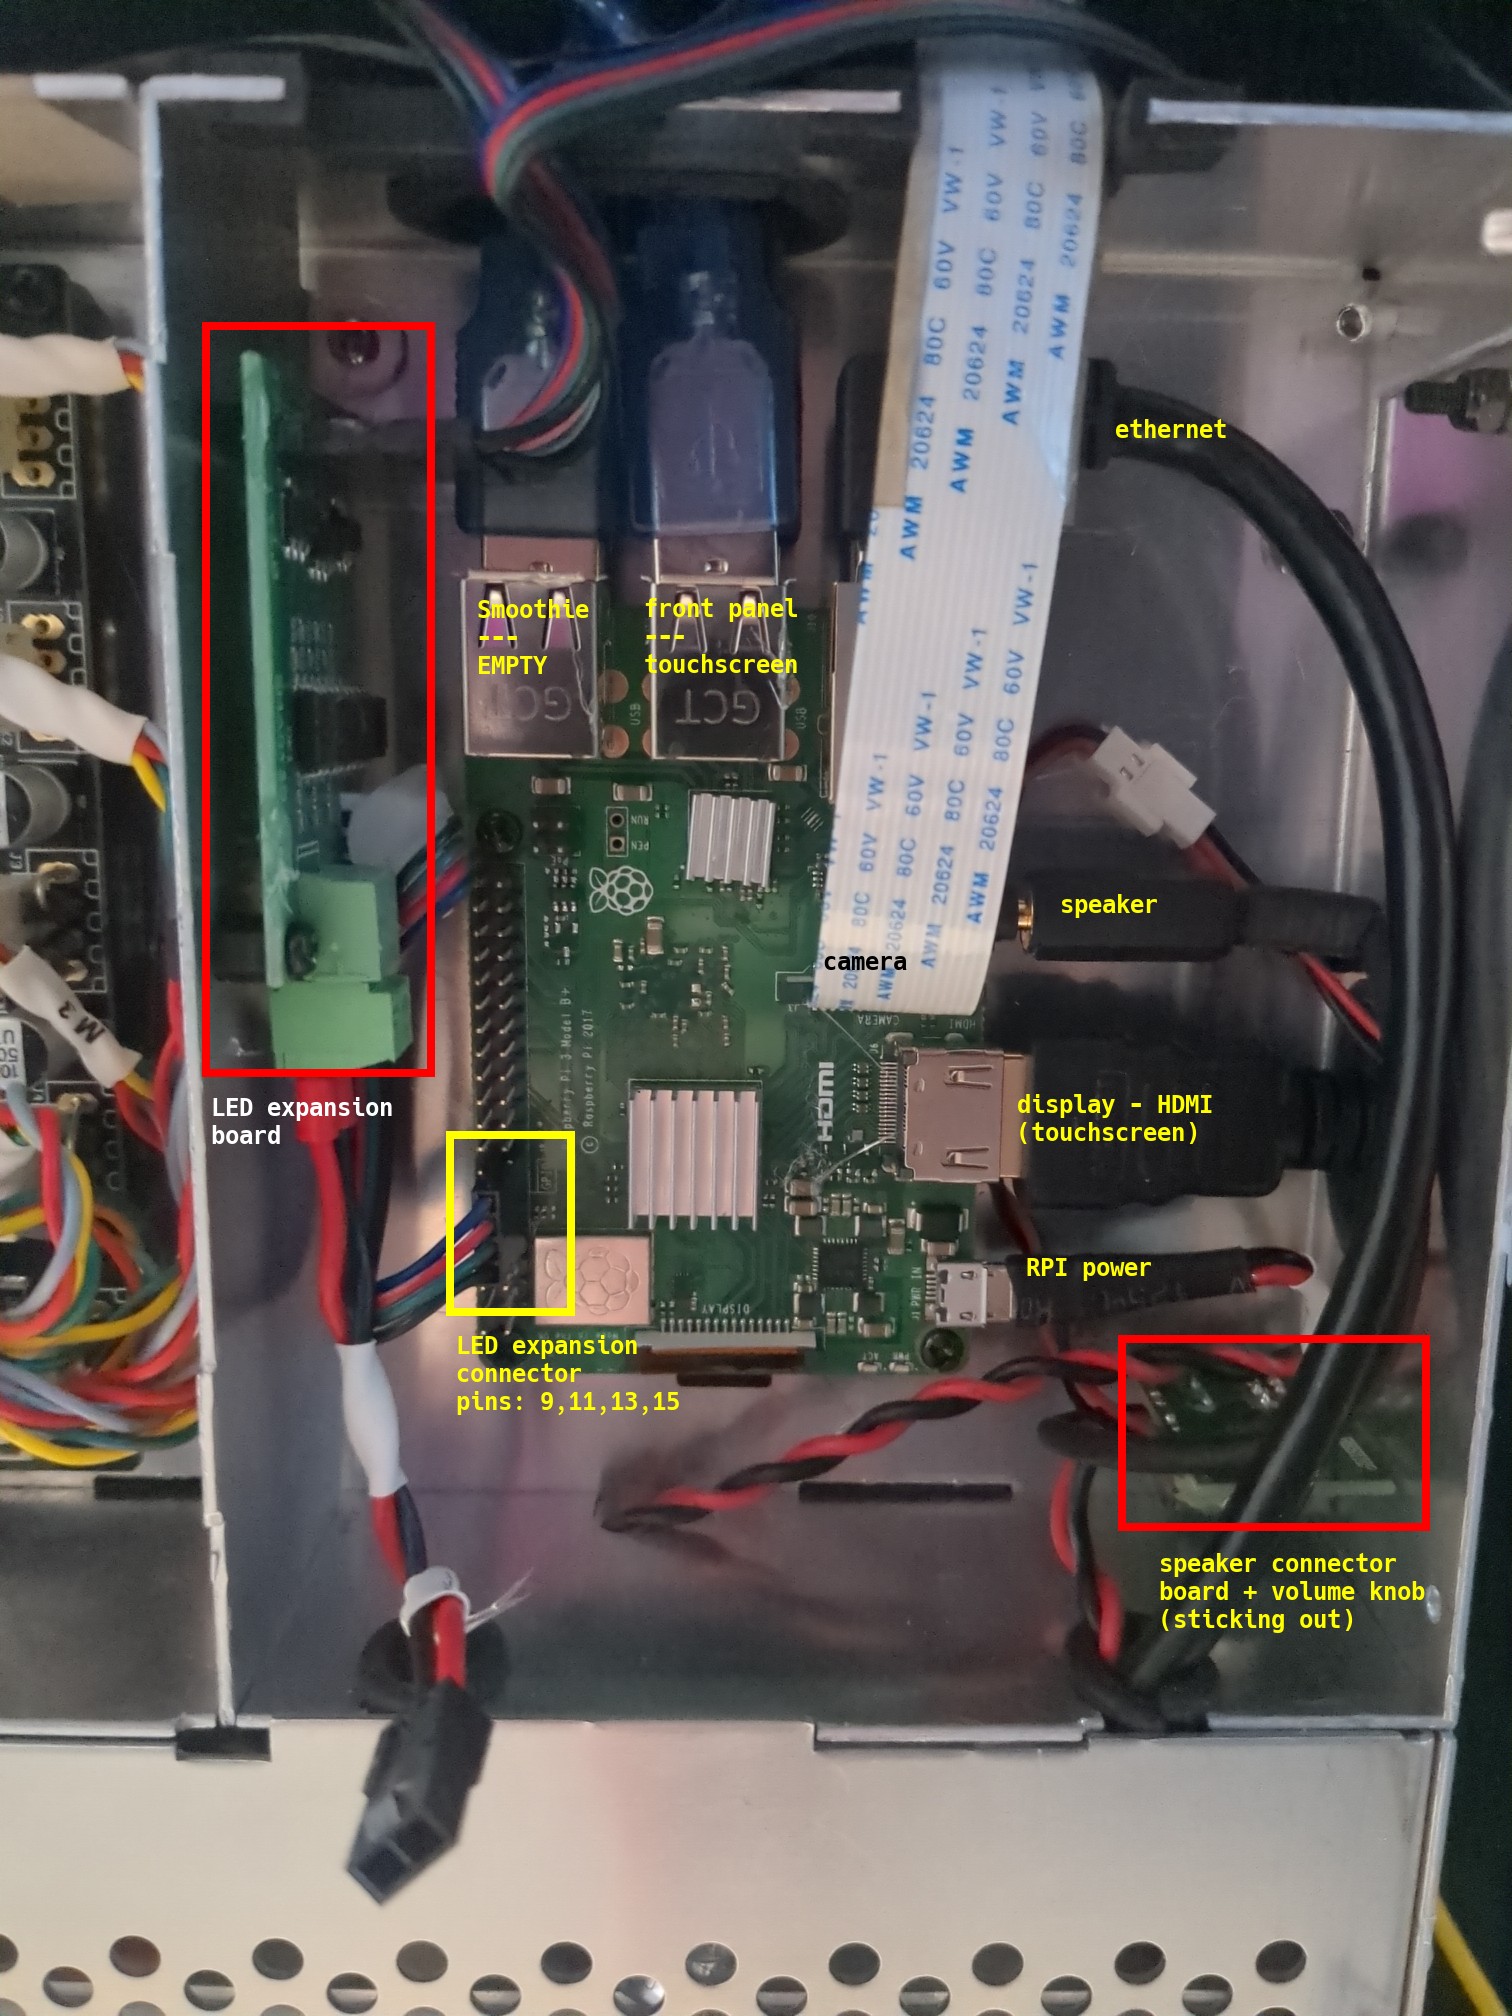
Hardware documentation
- standard raspberry pi 3b
- standard smoothieboard v1
- LED driver board connected to the rpi (generic 4pin - rgb+ground - pwm-driven ledstrip)
- removed most of hotglue as it did not hold the connectors anymore anyway
Raspberry PI
Nothing really surprising here
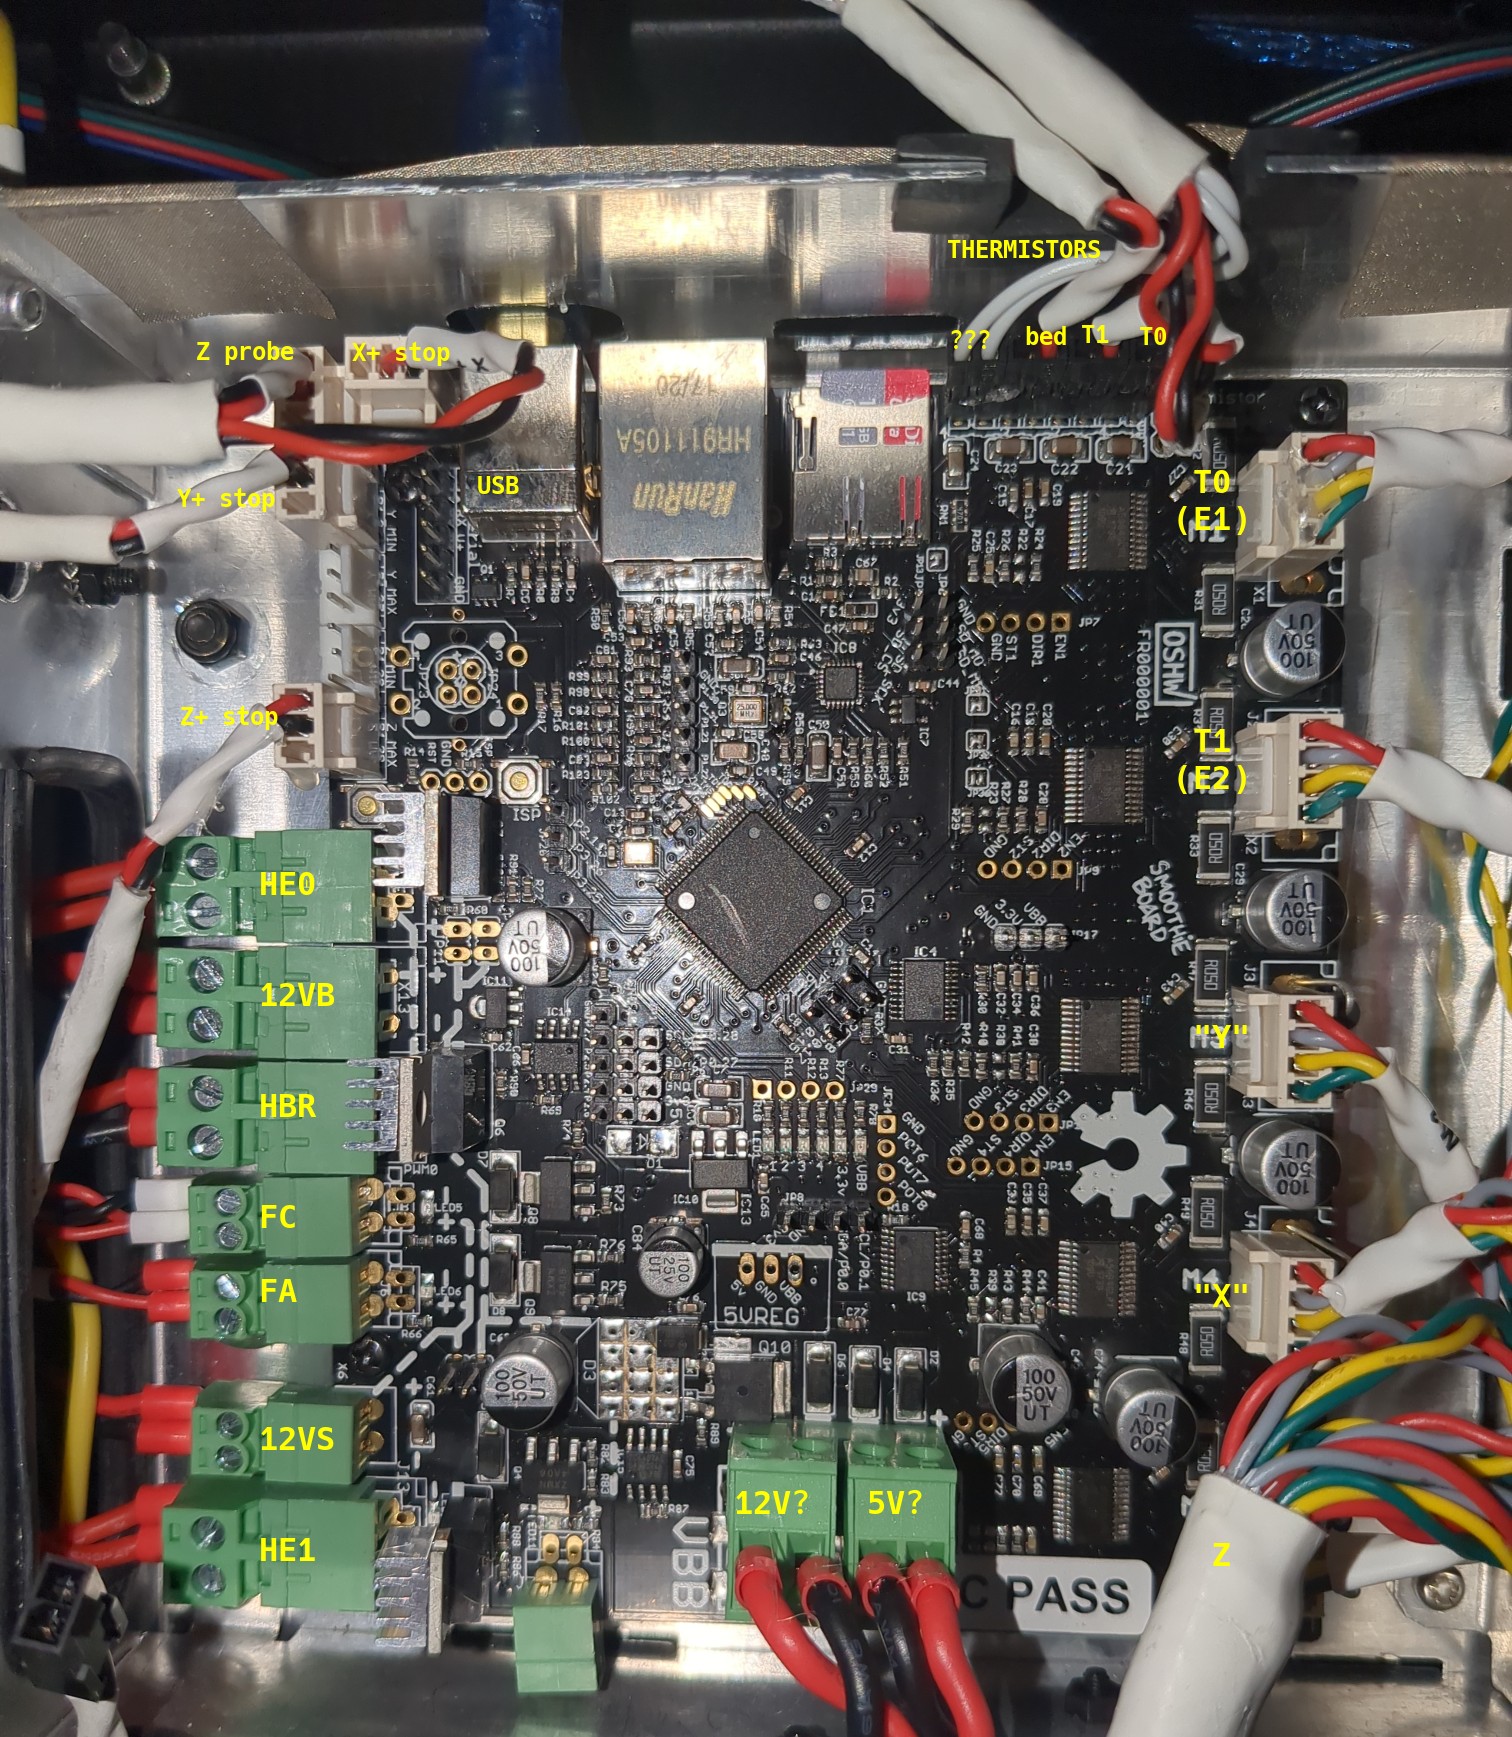
Smoothieboard
Almost all connected cables are labeled; motor connector labels are taken mostly from configuration file, as they were only labeled M{1..5}
Stock smoothieware config: https://code.hackerspace.pl/ar/kodak-portrait/src/branch/main/smoothie-stock/config
See also http://smoothieware.org/pinout
legend:
- HE0: heater for extruder 1
- HE1: heater for extruder 2
- HBR: heatbed heater
- FC: M106/M107 Fan; extruder fan(s?)
- FA: M42/M43 Fan; “ambient fan”? possibly the exhaust/filter fan
Config also references the two free endsop inputs as filament runout sensors, but neither sensors nor cables are present.
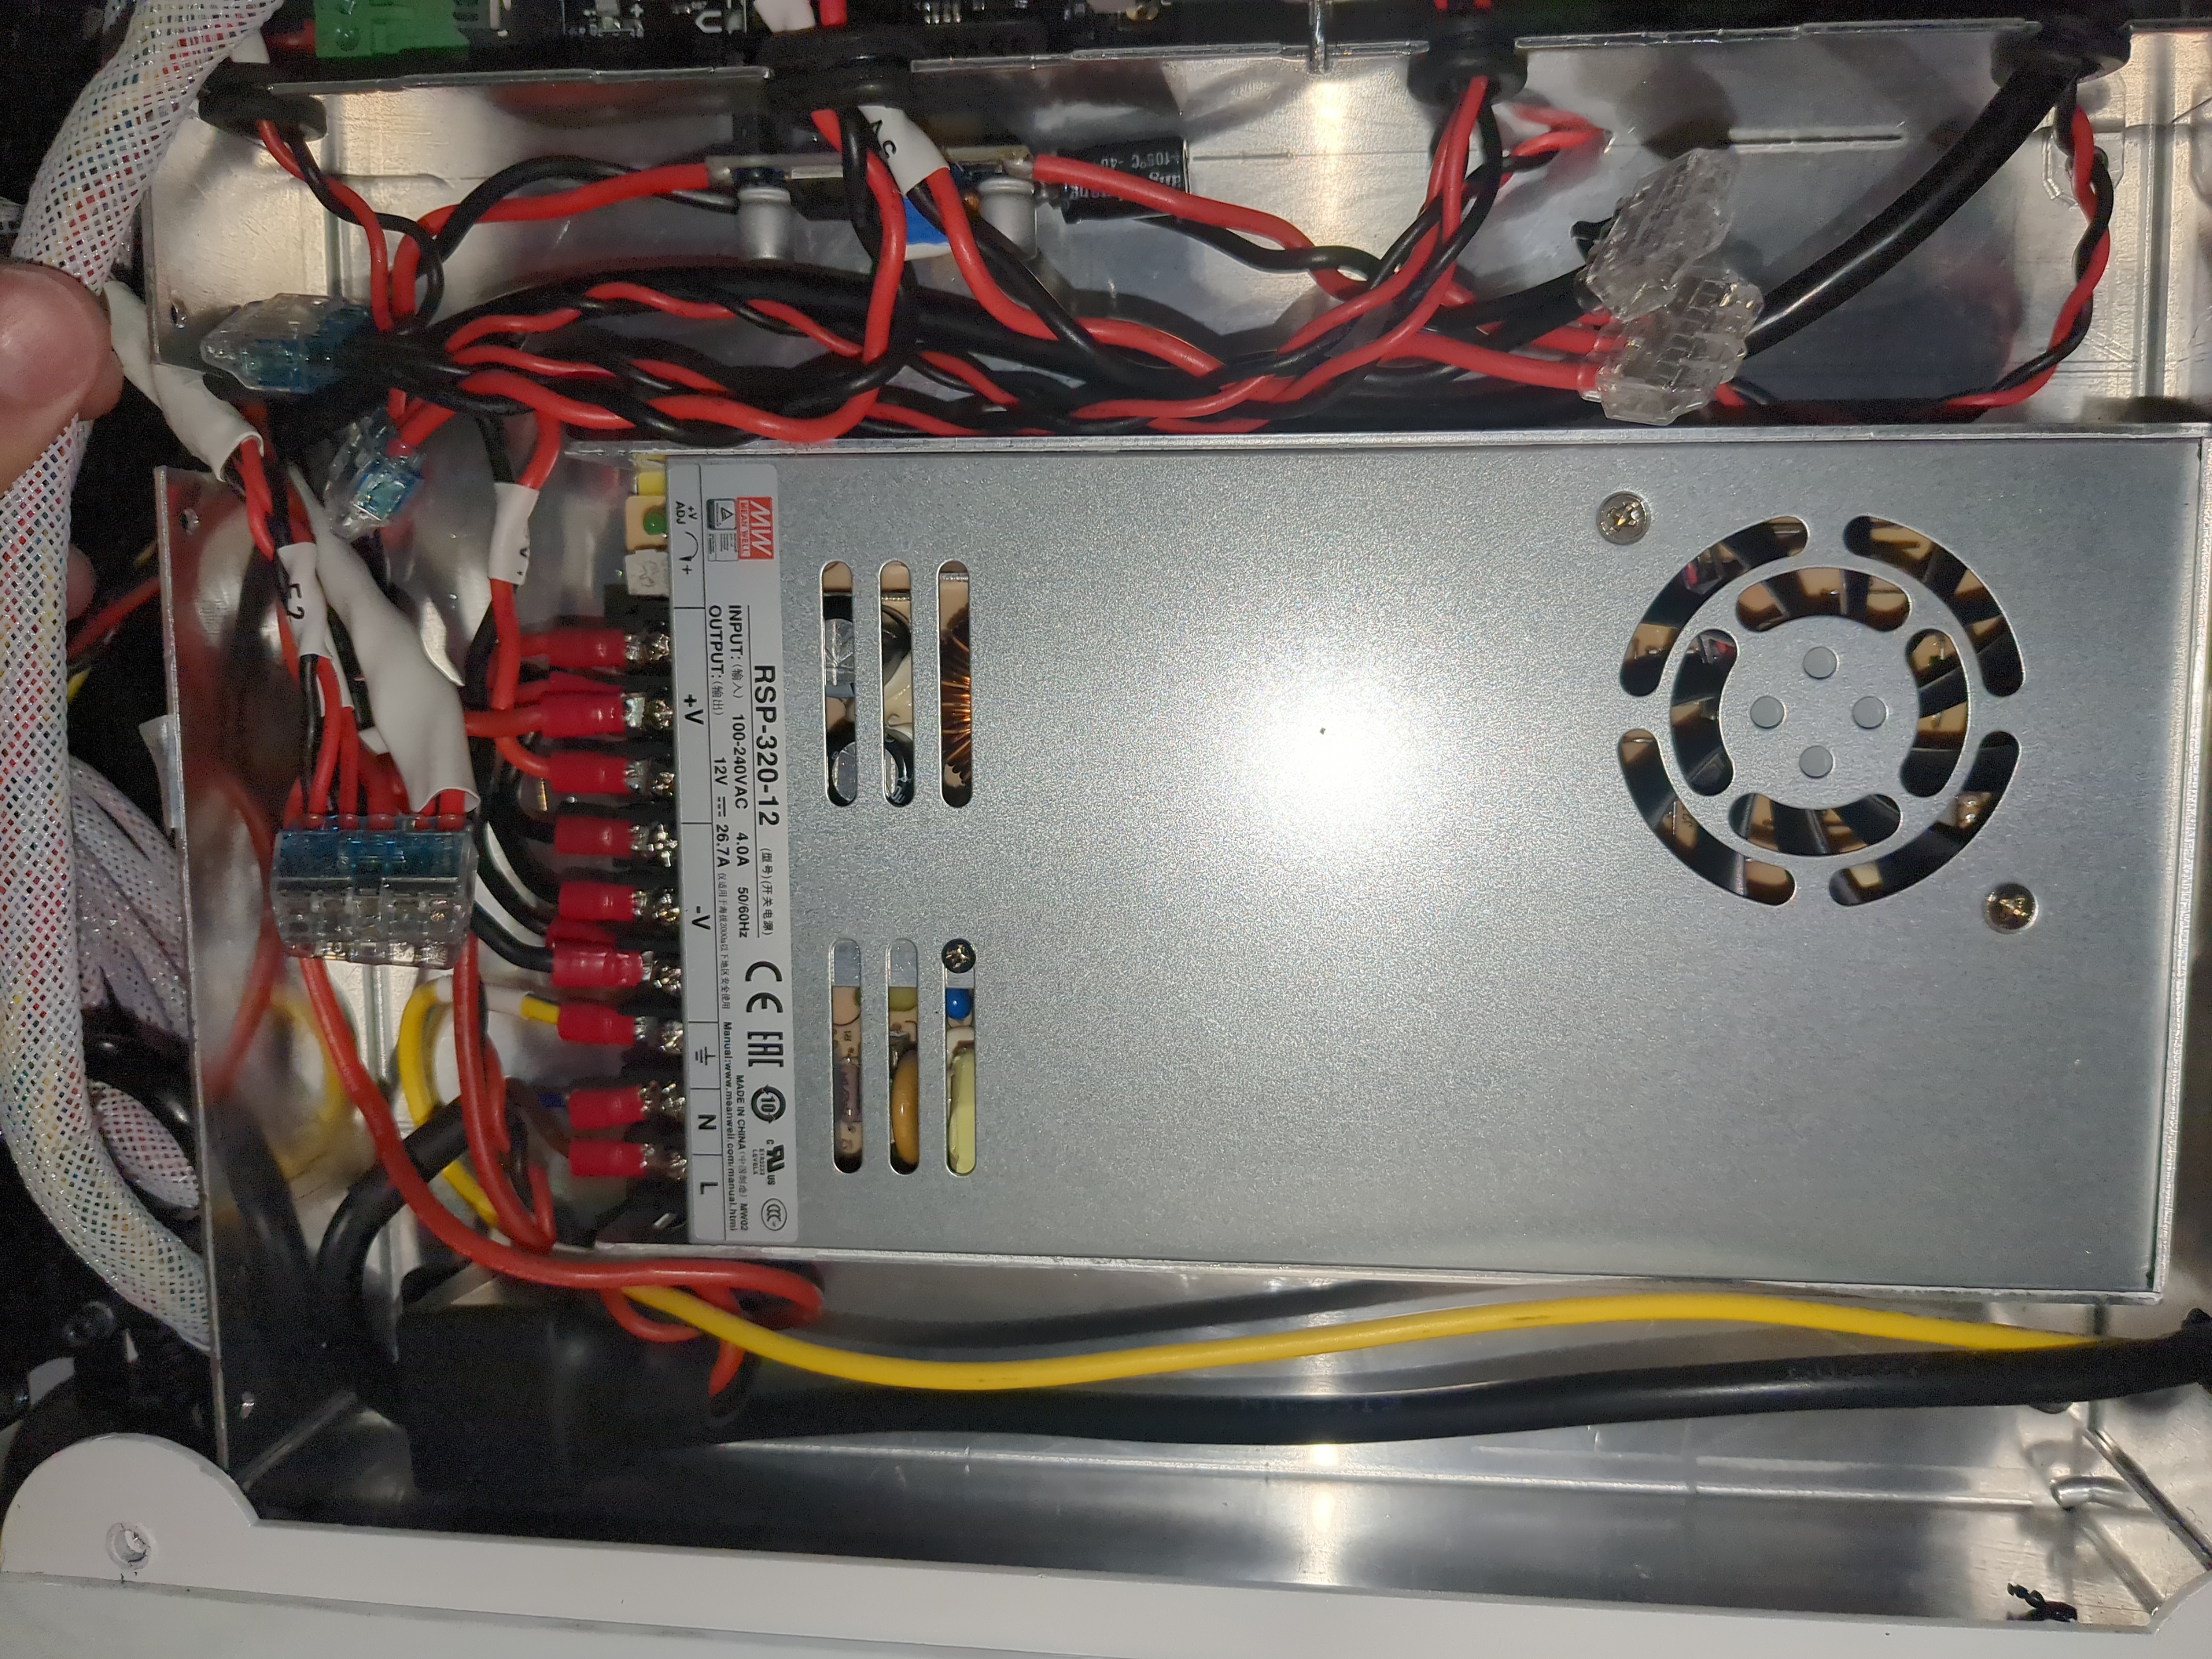
Power supply
Again, nothing really surprising here. Just a “Mean Well RSP-320-12” and a stepdown board providing 5V to rpi and smoothie

TODO
- obtain second print surface
- change priming macro so that the line is parallel to the printer front
- filament (un)load macros
WIP
This section needs expansion. You can help by prodding my (ar) ADHD brain to do something with it, or pick an item from TODO list yourself.
- general usage instructions
- slicer profiles
- filament runout sensors - ordered two
-
- will probably move more of the tool change macros to klipper, to make slicer profile creation easier
- The printer is now 300% more gay!
- The LEDs aren't synced to any action, but “rpi” as a microcontroller works now
- relevant config sections:
DONE
This section needs expansion. You can help by prodding my (ar) ADHD brain to do something with it, or pick an item from TODO list yourself.
- hardware documentation (what's connected where and how)
- calibration, at least to the extent reasonable before we have proper slicer profiles
- general UI/UX:
- klipperscreen running in cage on the touchscreen
- fluidd for webui
- moonraker accessible over network for slicers
- fix camera/audio under nixos
- solve filament/power switch access
- now on a shelf next to the entrance, between main room and electronics lab
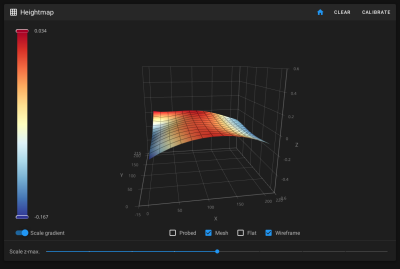
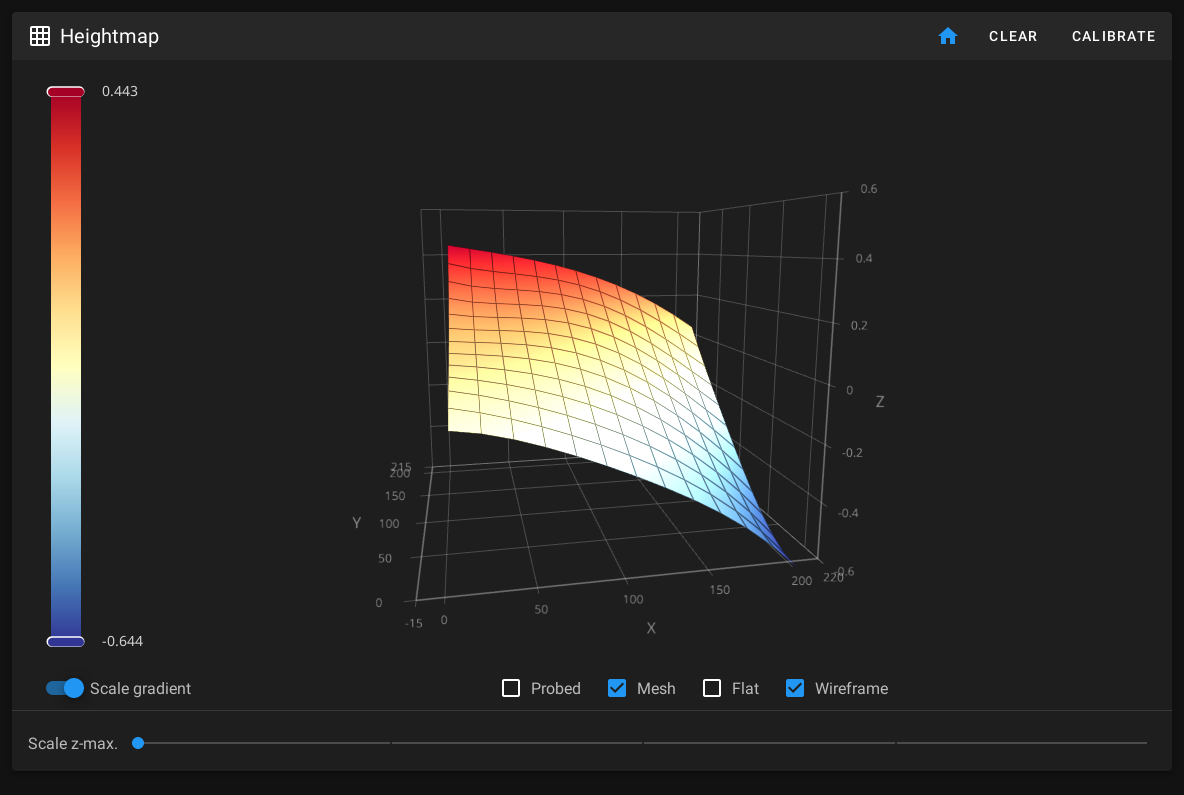
- skewed bed
- the difference between far-left and front-right corners was around 1mm

- shimmed the bed enough to reduce the skew to 0.2mm

Preliminary findings
- controlled with a normal rpi3 + smoothieboard combo
- screen is connected over hdmi (+ usb for touch?), 800×480 res
- camera uses the camera interface
- one usb port is used for connecting to smoothieboard, one is routed to the outside, and one is free
- there's a speaker!
- doesn't appear to do anything fancy to lock-out mods
- disassembly, at least for getting to the electronics compartment is trivial:
- unscrew two screws on left and right (4 total) that hold the bottom panel (regular hex bit)
- unscrew the feet (next size larger hex bit)
- unscrew 4 screws on the *sides* of the metal box holding the electronics (the ones that you see in front of you hold the fans)
- remember to detach the fans when opening the box
no longer relevant
these items referred to stock software/firmware, leaving them here for future reference for anyone from the wider internets stumbling upon this page
- ran raspbian by default
- didn't complain about creating
/root/.ssh/authorized_keys - on running system, root filesystem is by-default mounted readonly, which is a Good Choice™ on an rpi with sd card;
mount -o remount,rw /and latermount -o remount,ro /work as expected. - password for
piuser is, for now, identical to hswaw wifi password, passwordless sudo is enabled. - the printer runs its control panel using chromium pointed at a webserver running locally. that's listening on all interfaces. try http://printers-ip-address:8888/home (check setup → connectivity → network)
- „Myślę, że w tym przypadku masz do czynienia nie tylko z powierzchnią ataku, ale również z objętością” ~ drozdziak1
Resources
“stock” slicer (really just an old cura, reskinned), stock firmware images: https://cloud.is-a.cat/s/NsaCHnyDMn8cFWE
Many resources about the printer from, apparently, its actual vendor: https://exolicious.com
Plans
Would prefer to keep hardware mostly unmodified, except for following
- replace the e3d v6 with e3d revo (and obxidian nozzles) which is almost a drop-in replacement
- replace the 12V PSU with 24V
- add filament runout sensors
- buy angled cables and rotate the screen proper way round.
- accelerometer for input shaping
- brushes for automated nozzle cleaning